
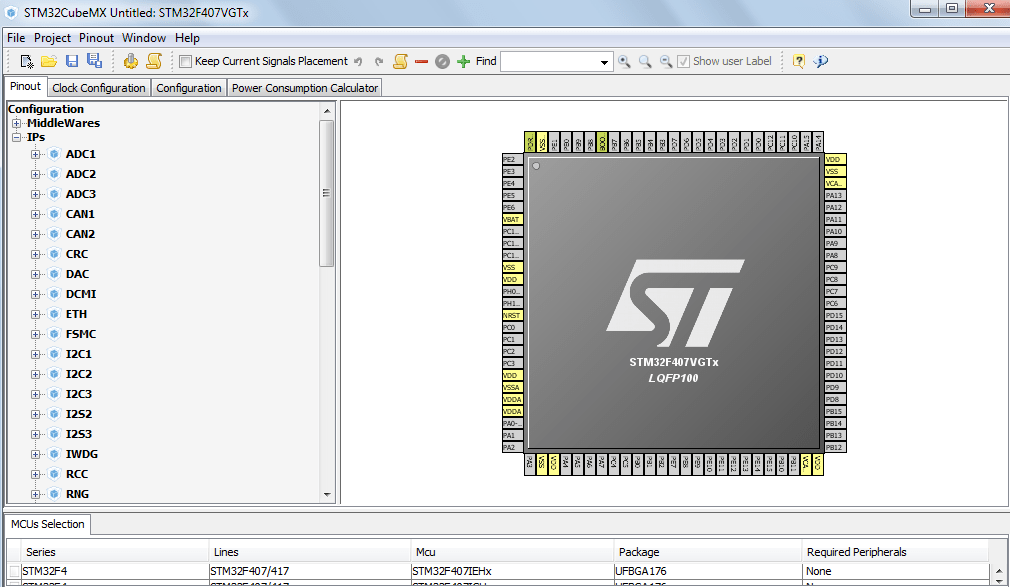
As soon as STM32CubeMx becomes more and more popular among developers all over the world, I've decided to post a series of articles, describing different aspects of using the STM32CubeMx utility. And we will start with the basic MCU unit - STM32 GPIO or general-purpose input/output .
Don't miss the first article devoted to STM32CubeMx - here is the link!
For this project I'll use the following tools:
- IAR Embedded Workbench v6.70 for compiling the source code
- STM32F4Discovery development board for debugging and testing
If you want to use another board with another microcontroller mounted on it, it won't be a problem, because the process of project creating and code generating with STM32CubeMx is almost similar for any MCU.
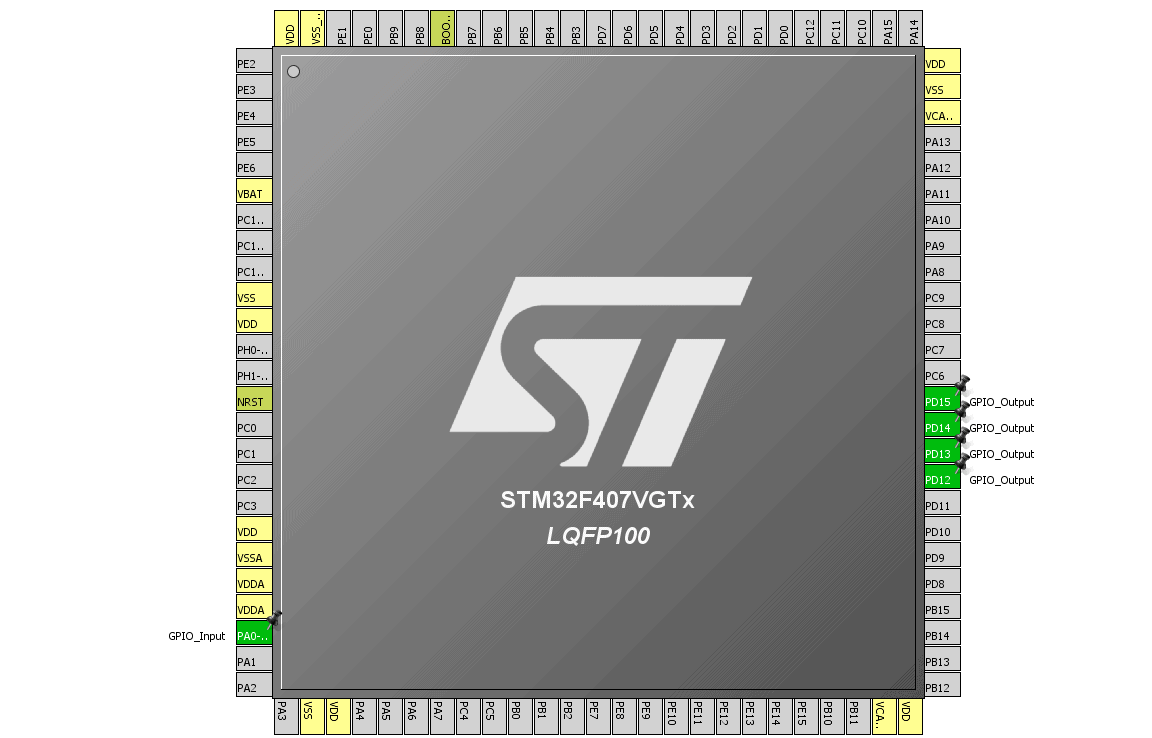
So, our article today is aimed first and foremost at configuring some of available GPIOs using STM32CubeMx. My Discovery board is equipped with four LEDs, each of which has different color (green, blue, red and orange). Furthermore, there are two buttons, one is connected to Reset circuit and another - to PA0 pin. So, let's create an application which will turn on green and blue LEDs if the button is pressed. And while the button is left unpressed these LEDs will be turned off and another two (red and orange) will be turned on. As you see there is nothing complicated 🙂 The LEDs are connected to the following STM32 GPIO:
Thus, we should configure PD12, PD13, PD14 and PD15 to work in general output mode. And PA0 should be configured as input, because we'll read the button state with the help of this pin:
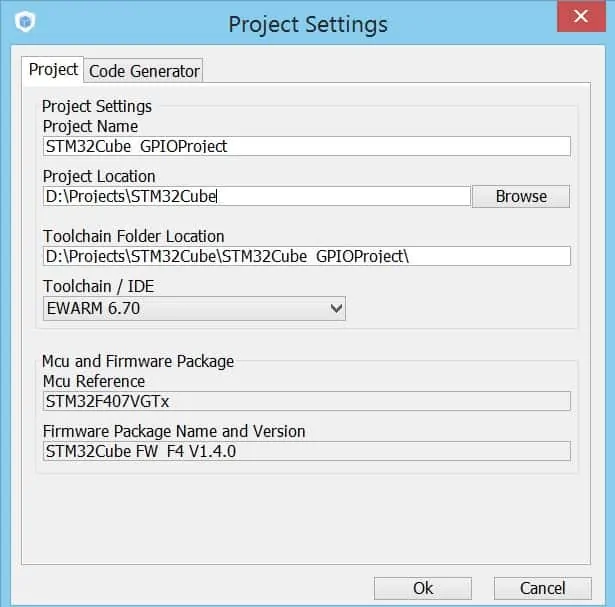
Now, let's open the settings window (Project -> Settings) and set our project's name. Furthermore, we should choose an IDE which will be used for editing and compiling the project.
Everything is ready for generating project files! Let's press Project -> Generate Code button. As a result STM32CubeMx has added new files (project and source files) into the folder which we've selected as our project location. So we can open and compile the project:
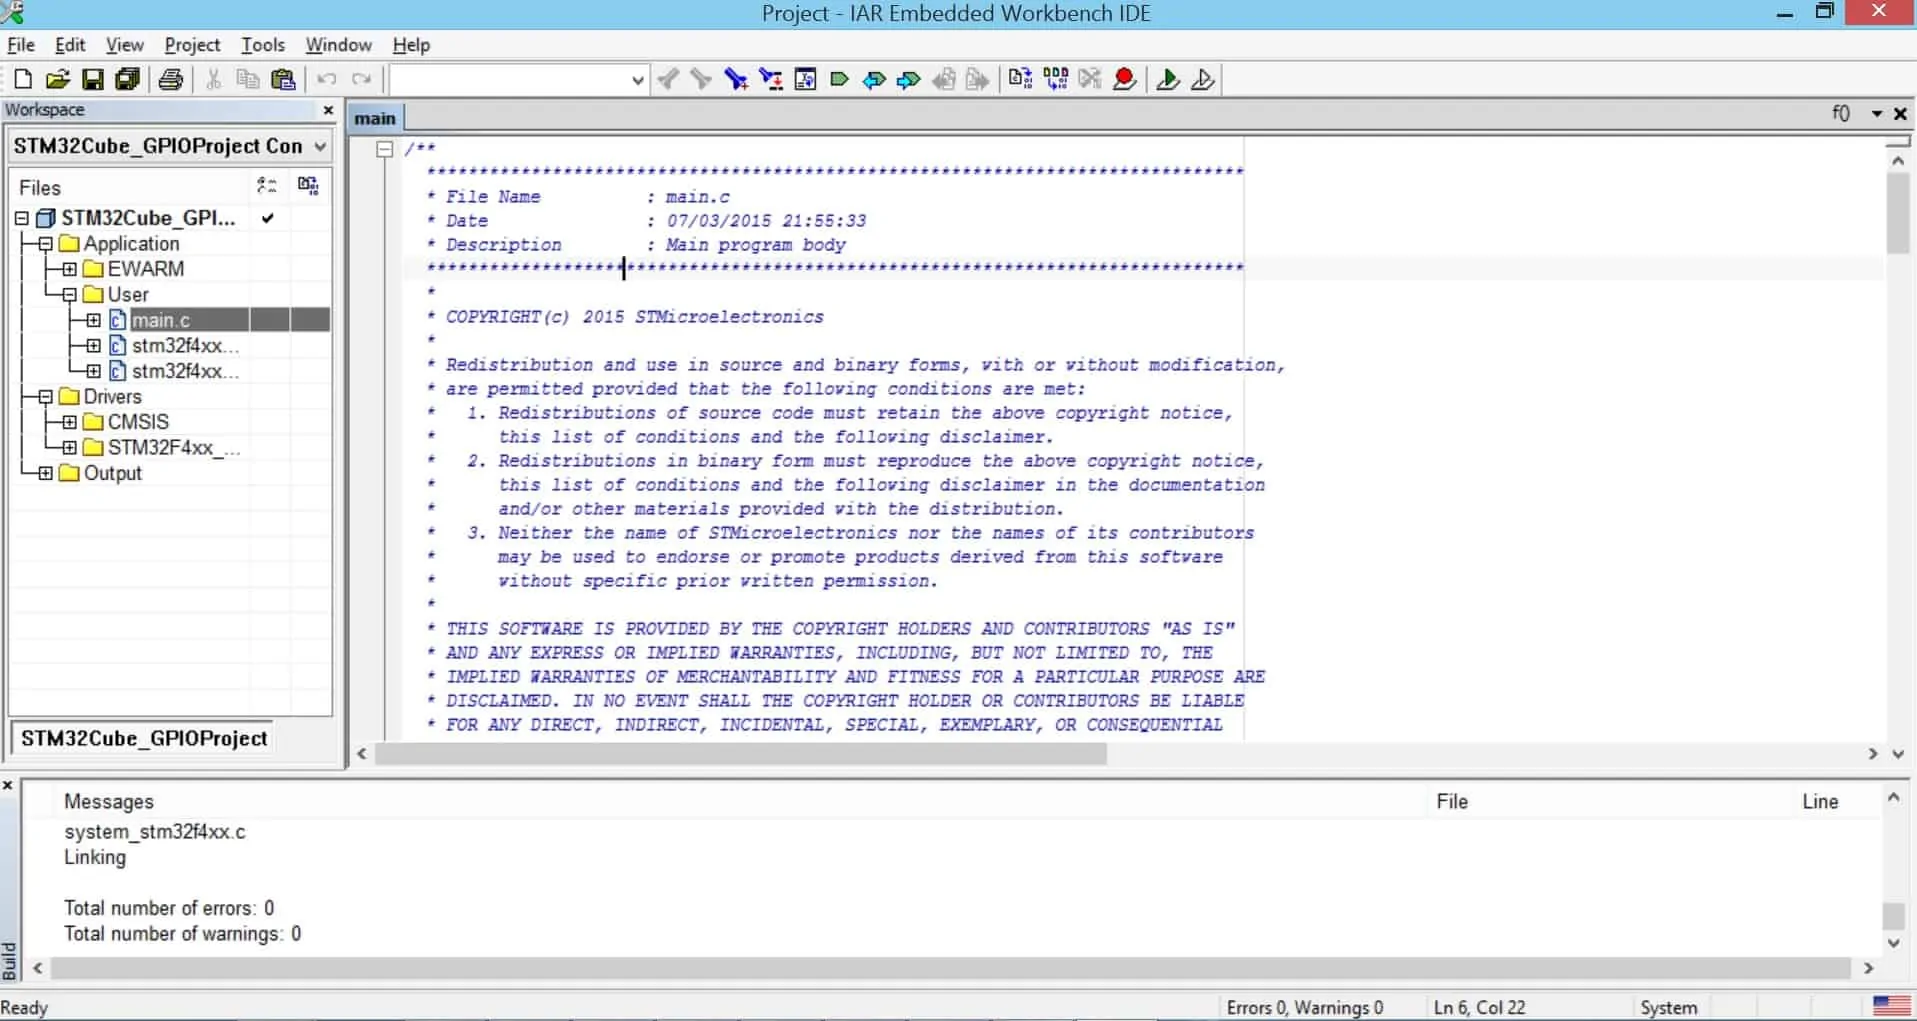
Thus, STM32CubeMx perfoms the following operations:
- First of all it generates initialization functions and puts it in created source files
- After that it creates project files, so we can open the project in chosen IDE
- Moreover, it copies all necessary libraries in our project folder, and there is no need to do it manually
However, it can't write the high-level code for us 🙂 Let's do it ourselves. All source files contain special sections where we can write our own code. If we'll decide to regenerate the project lately, STM32CubeMx will copy all user code into new source files. So, user code won't be lost:
int main(void)
{
	/* USER CODE BEGIN 1 */

	/* USER CODE END 1 */

	/* MCU Configuration----------------------------------------------------------*/

	/* Reset of all peripherals, Initializes the Flash interface and the Systick. */
	HAL_Init();

	/* Configure the system clock */
	SystemClock_Config();

	/* Initialize all configured peripherals */
	MX_GPIO_Init();

	/* USER CODE BEGIN 2 */

	/* USER CODE END 2 */

	/* USER CODE BEGIN 3 */
	/* Infinite loop */
	while (1)
	{
		uint8_t currentButtonState = HAL_GPIO_ReadPin(GPIOA, GPIO_PIN_0);

		if (currentButtonState == 0)
		{
			HAL_GPIO_WritePin(GPIOD, GPIO_PIN_12, GPIO_PIN_SET);
			HAL_GPIO_WritePin(GPIOD, GPIO_PIN_15, GPIO_PIN_SET);
			HAL_GPIO_WritePin(GPIOD, GPIO_PIN_13, GPIO_PIN_RESET);
			HAL_GPIO_WritePin(GPIOD, GPIO_PIN_14, GPIO_PIN_RESET);
		}
		else
		{
			HAL_GPIO_WritePin(GPIOD, GPIO_PIN_12, GPIO_PIN_RESET);
			HAL_GPIO_WritePin(GPIOD, GPIO_PIN_15, GPIO_PIN_RESET);
			HAL_GPIO_WritePin(GPIOD, GPIO_PIN_13, GPIO_PIN_SET);
			HAL_GPIO_WritePin(GPIOD, GPIO_PIN_14, GPIO_PIN_SET);
		}
	}
	/* USER CODE END 3 */
}
Now we can start the debug session with our development board, and we'll see that everything works fine. As you see STM32CubeMx is a very convenient instrument 🙂 Next time we will try to configure another MCU units with it. Subscribe to MicroTechnics.ru!

.")

